

Marty doesn’t require a Raspberry Pi to be programmable in unplugged mode, Blocks Jr, Blocks, or python, but it is super-easy to add a Raspberry Pi computer to Marty the Robot. And if you do then you’ll be able to do really awesome things like adding a camera and vision system, or running ROS, the Robot Operating System
Adding a Raspberry Pi makes your Marty completely autonomous, so it can operate without needing to be connected to a computer or tablet, but you’ll still be able to remote-desktop into the Raspberry Pi computer to start, stop and debug programs whenever you want
Some cool things you could do with a Raspberry Pi and Marty include:
- Use a camera to get Marty to play football autonomously, recognize faces, or navigate around an environment
- Add a microphone and do speech recognition
- Run ROS and do advanced things like Simultaneous Localization and Mapping (SLAM) using sensors like a camera and distance sensors
- Add a screen to your Marty
- Use other sensors that connect by USB, or serial to the Raspberry Pi
Marty is a great introductory platform for learning robotics, and adding a Raspberry Pi means you can study high school and even university level topics with Marty
What is a Raspberry Pi?
A Raspberry Pi is a credit card sized Single Board Computer (SBC) – that means it’s a proper computer that runs an operating system just like your laptop or desktop computer, but it’s small enough to fit inside Marty’s head, and designed to be low power
Raspberry Pi computers run a version of Linux – usually either the default one, Raspbian, or Ubuntu.
How is Marty compatible with the Raspberry Pi?
Marty’s main control board has an expansion port specifically designed for connecting to things like the Raspberry Pi. Using the cable you can connect directly from this port to the header on the Pi, and it will provide power from Marty’s battery as well as a bidirectional data link for sending commands and receiving data from Marty’s sensors
- Simple connection using this cable
- On the Raspberry Pi, you can use our martypy Python library to communicate with Marty directly over this cable, just like you do over WiFi but running fully autonomously on Marty
- No need for another power source for the Pi
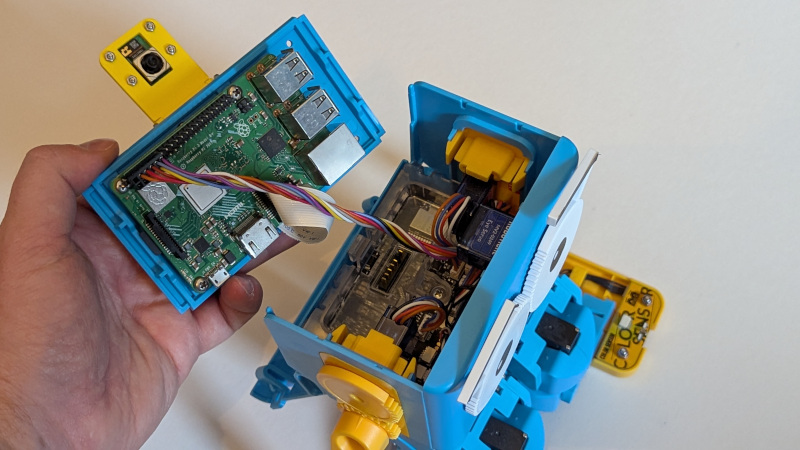
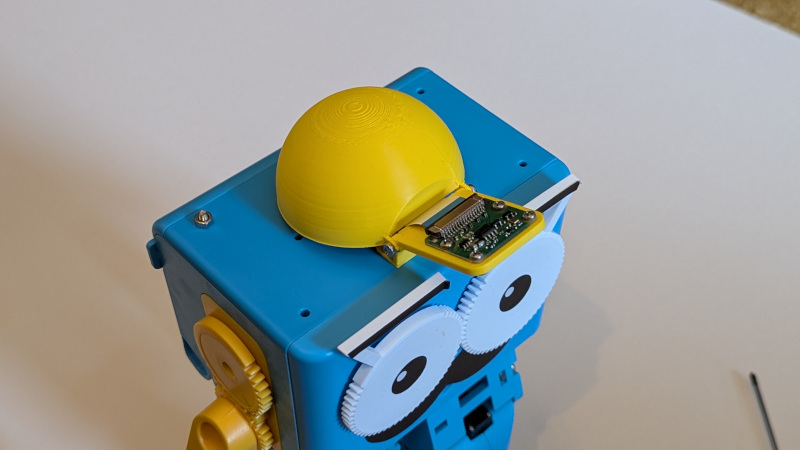
- The top-plate of Marty’s head is designed to be a mount for a pi, so that it fits seamlessly and protects the pi from damage.
- There is space inside Marty’s head for small USB dongles
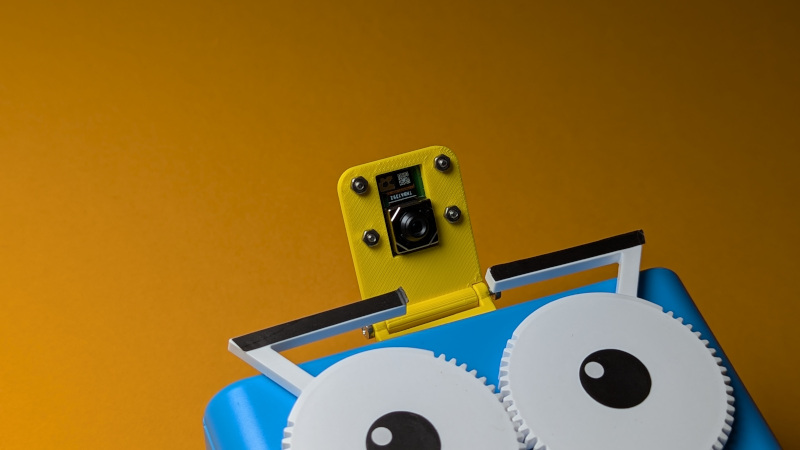
- A camera mount can be used to mount a Pi camera inside or on top of the head. These can be 3D printed or bought from us
Which Raspberry Pi should I use with Marty?
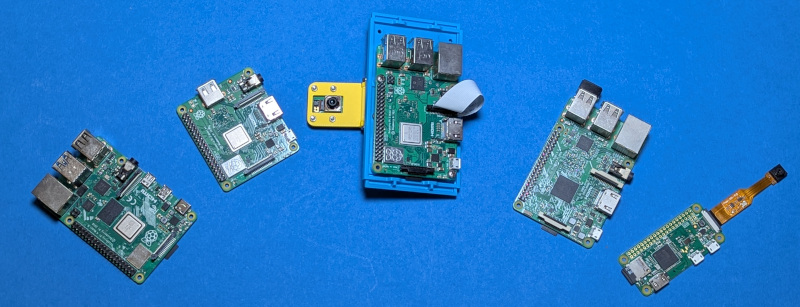
There are 5 versions of the main Raspberry Pi, plus some smaller variants. All of these except the compute modules can be connected directly to Marty’s control board and mounted on the top plate. The Pico is more of a microcontroller than a computer and isn’t suitable for this.
The best Pi for Marty is one that balances computing ability with power requirements, so that it is fairly capable of running code like vision systems at a respectable frame rate without draining the battery too fast or overloading the short-circuit protection on Marty’s battery. If you want to use ROS you should also use a Pi that supports a 64 bit OS
Marty is designed to supply up to 3A of current at 5V across both the robot and the expansion connector. The power draw of the motors will fluctuate based on how Marty is moving, so we recommend that you don’t draw more than 1A through the header to give enough power for the motors, LEDs and other bits of Marty to function. If you draw too much then the short circuit protection may kick in and Marty will reset.
| Pi Model | Compute Power | Electrical Power | 64-bit OS | Recommended for Marty? | Use Case | MSRP (USD) |
|---|---|---|---|---|---|---|
| 1 | Poor | Ok | No | No | – | |
| 2 | Poor | Ok | No | No | – | |
| 3A+ | Ok | Good | Yes | Yes | Long battery life, ok ability. Best all-rounder | 35 |
| 3B+ | Reasonable | Ok | Yes | Yes | More RAM but less battery life. | 35 |
| 4 | Good | High | Yes | Not really | High power, but battery will run out fast and it gets warm | 35-75 |
| 5 | Excellent | Too high | Yes | No | – | – |
| Zero 1 | Middling | Good | No | No | – | – |
| Zero 2 W | Ok | Good | Yes | Yes | Best battery life, but slowest performance. Good value | 15-18 |
| Pico | Not suitable | – | – | No |
So overall we’d recommend a Raspberry Pi 3A+ or 3B+, or a Zero 2 W for use with Marty
Which Pi camera should I use?
There are a variety of official Raspberry Pi camera modules available, as well as lots of third party ones.
We’d recommend the Camera Module 3 Wide as this gives the best field of view for your Marty
How to install the Raspberry Pi
We’ve tried to make it as straightforward as possible to connect a Raspberry Pi to your Marty
You’ll need
- A Raspberry Pi and micro SD card (32GB+ recommended)
- The Marty -> Raspberry Pi connector cable
- Optionally a Raspberry Pi Camera and mount
- Some M2.5 nuts and bolts for mounting the Pi, and M2 nuts and bolts for securing the camera module
- A compatible HDMI cable and a screen, USB keyboard and mouse to help get the Pi set up
- A USB power supply to power the pi while you configure it, although once installed in Marty it will be powered by Marty’s battery
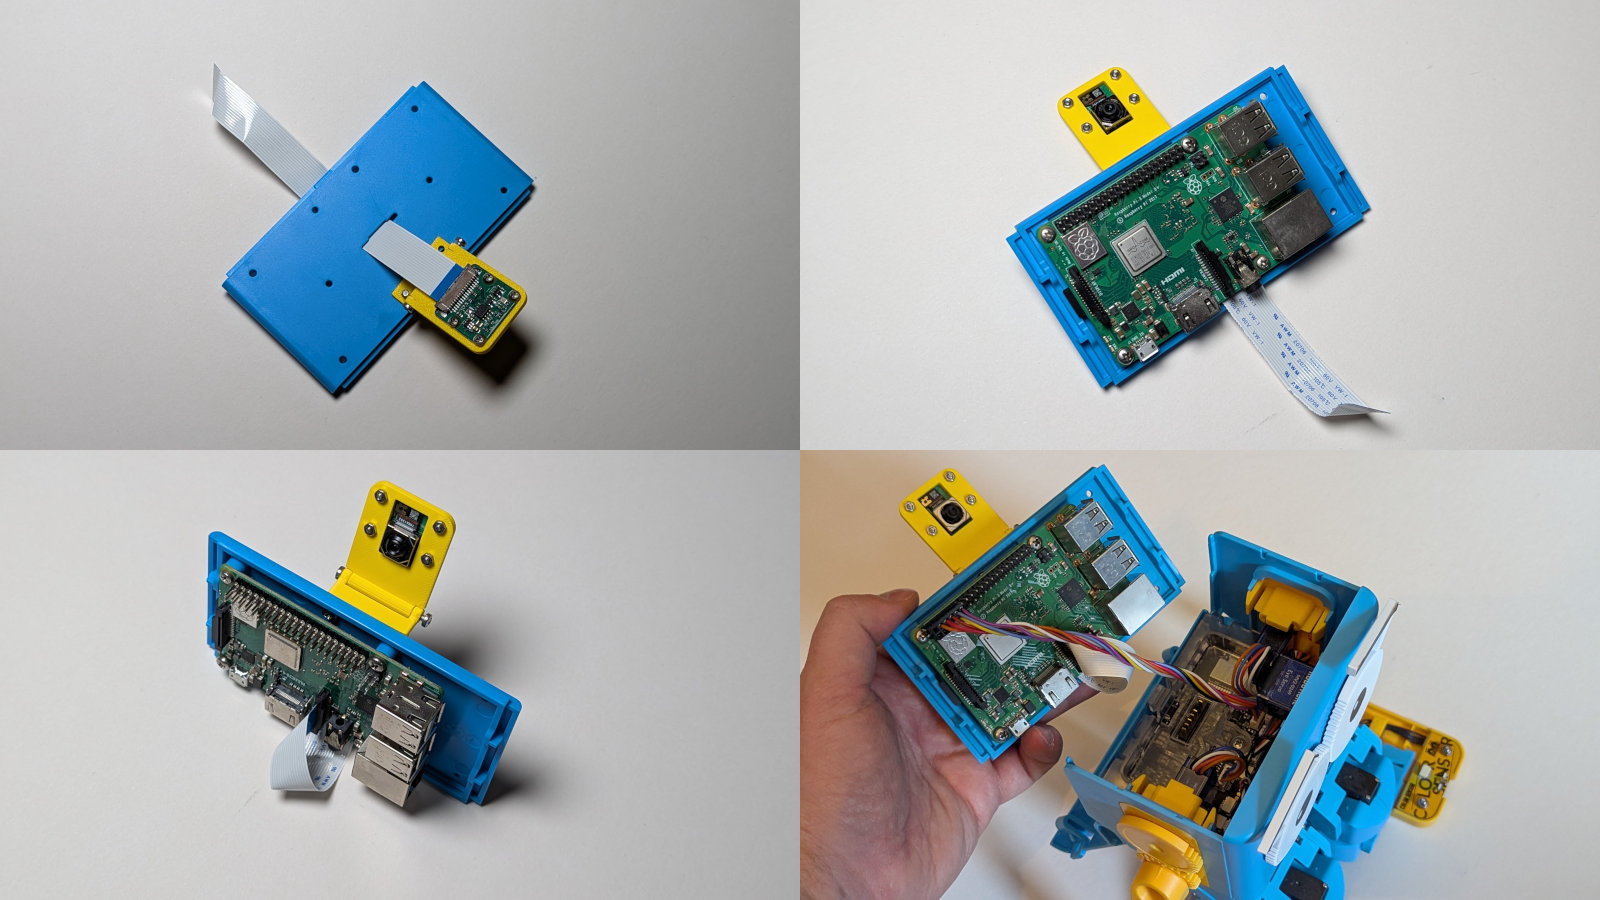
- Remove the top plate from Marty
- If installing a camera, attach it to the top plate first and feed the cable through the slot
- Attach the Raspberry Pi computer
- Attach the camera cable to the Pi
- Connect the Pi to Marty’s control board, then just click everything together
Optionally you can also add a little hat to cover the cable and make the camera mount look like a baseball cap for Marty!
The top-plate camera mount allows you to easily adjust the angle of the camera, from looking straight down at Marty’s feet to facing forwards. In this way you can tailor it for your application – from obstacle avoidance, football or line following looking down, to face recognition if looking forwards.
Getting Started with the Pi and Marty
Follow these steps to set up the Raspberry Pi. You can do this before installing the Pi into Marty
- Prepare the SD card by installing the OS of your choice – there are great instructions for this on the Raspberry Pi website
- We’d recommend Raspbian OS for almost everyone, if you want to use Ubuntu then be aware that getting peripherals to work will be more complicated
- Install the SD card into the Pi, and connect a screen, keyboard and mouse. Then power up the Pi
- Set up the Raspberry Pi
- Follow the instructions here to activate the serial port that we’ll use to talk to Marty
- Connect the Raspberry Pi to a WiFi network
- Set up Rasbperry Pi Connect so that you can easily remote-desktop in to your Pi once it’s installed into Marty. You’ll still be able to connect a screen to it by opening the back panel of Marty, but Connect is much easier!
- Install the martypy library
With that done, you can install the Raspberry Pi into Marty, and when you turn Marty on it’ll also power up the Pi. You can then connect to it over Raspberry Pi Connect and program away!
Next Steps
In future blog posts we’ll showcase some specific applications using the Pi on Marty – in the past we’ve got Marty to play football autonomously and added voice control!
We’ve also seen our users do amazing things like using a camera to read sheet music and then making Marty play percussion!
Would you like us to offer bundles of everything you need to get started with the Raspberry Pi? i.e. pi, cable, sd card, camera mount – if so, let us know!

Other posts you may like
How to Teach Your Kids to Code
Perhaps your kids have already tried a micro:bit in class or started coding with Scratch in an after-school club. If they are showing an interest in coding, continuing that learning...
Why is AI Literacy Important?
As we mark AI Literacy Day, it is worth asking a crucial question: why does AI literacy matter so much for today’s students? It's a fundamental part of the digital...
Why Probeware Matters in Science Education
In today’s classrooms, hands-on learning is essential. Students learn best when they can see, measure, test, and experience concepts directly. That’s where probeware comes in. By giving learners the tools...
TRY MARTY
FOR FREE
Are you looking for new STEM resources for your classroom? Robotical are loaning Marty the Robot to schools for no-obligation, 2 week trials.